Working with the Folder Content
1. Sorting the folder content
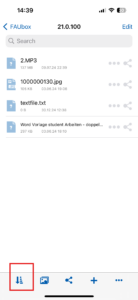
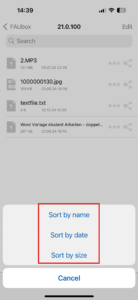
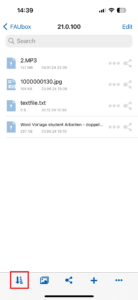
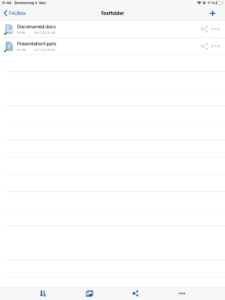
You can sort the folder content as desired by the file name, date or file size. In order to do that, you simply have to click on the arrow-bar-symbol on the bottom menu bar and select the preferred setting.
2. Changing the view mode
You can set the view mode for the folder content either to list or grid. If you want to change the view mode, you simply have to click on the grid symbol on the bottom menu bar to change into grid mode or click on the list symbol to let the folder content appear as a list.
3. Downloading the folder content
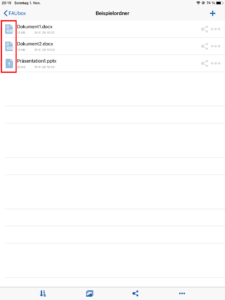
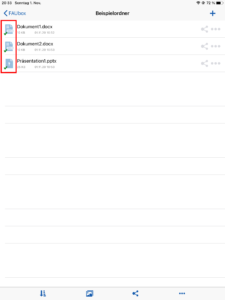
If you open a top-level folder without having downloaded it before (see working with top-level folders), then the folder content will appear without the green check mark.
As soon as you open a file, it will be automatically downloaded and the green check mark will be attached to it. Once downloaded you can then call up the data even if no network connection is available. (A file with no check mark is only available if your device is connected to the internet).
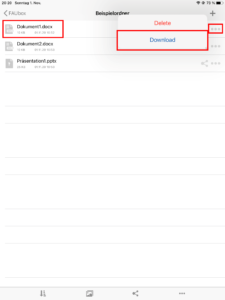
You can also manually download files without having to open them. In order to do that simply click on the triple dot symbol next to the respective files name and select Download.
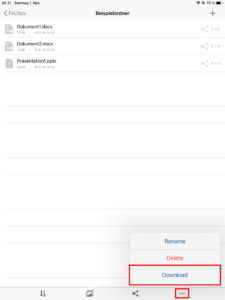
In case you want to download the whole folder content at once you have to click on the triple dot symbol at the bottom menu bar and choose Download.
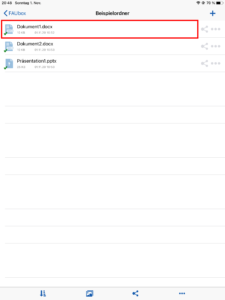
Done! The folder content has been successfully downloaded.
![]()
If you want to remove downloaded files from your device without deleting them from the FAUbox …
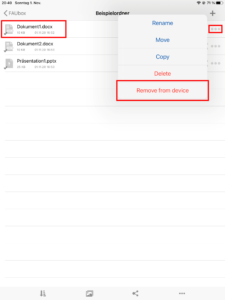
… then either click on the triple dot symbol next to the respective file and click on Remove from device to manually remove files individually…
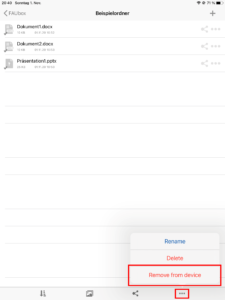
…or click on the triple dot symbol on the bottom menu bar and then on Remove from device to remove the whole folder content at once.
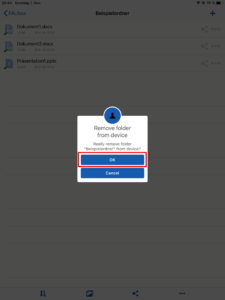
Next, confirm your choice by clicking OK!
4. Opening a file
To open a file in the FAUbox App you simply have to click on the bar of the respective file. If you have downloaded the respective file, you can use it even if there is no network connection available.
5. Renaming files/subfolders:
1. Open the top-level folder that contains the file/subfolder you want to rename.
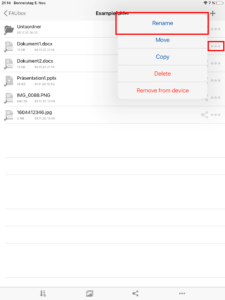
2. Click on the triple dot symbol next to the respective file/subfolder.
3. Click on Rename.
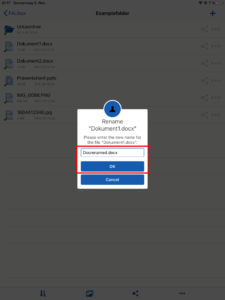
4. Enter a new name for the file/subfolder in the window that will open up next and click OK.
5. Done! The file/subfolder has been successfully renamed.
![]()
Please note! Do not remove or change the data identification that is attached to the file!
6. Moving files/subfolders:
1. Open the top-level folder that contains the file/subfolder that you want to move.
2. Click on the triple dot symbol next to the respective file/subfolder.
3. Click on Move.
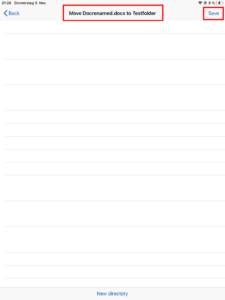
4. Next, you will be redirected to the top-level folder listing. Open the top-level folder that you want to move the file/subfolder into and save it at the desired location by clicking on Save in the upper right corner.
If you want to move the file/subfolder into a directory that does not exist yet, click on New directory on the bottom menu bar, create the directory and click on Save.
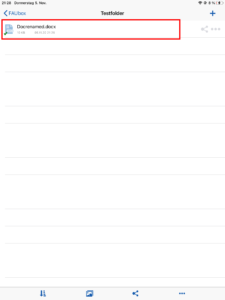
5. Done! The file/subfolder has been successfully moved to its new location.
7. Copying files/subfolders:
1. Open the top-level folder that contains the file/subfolder that you want to copy.
2. Click on the triple dot symbol next to the respective file/subfolder.
3. Click on Copy.
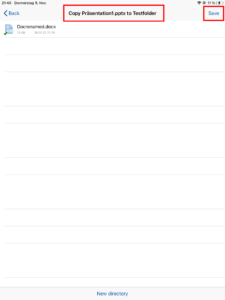
4. Next, you will be redirected to the top-level folder listing. Open the top-level folder that you want to move the file/subfolder into and save it at the desired location by clicking on Save in the upper right corner.
If you want to copy the file/subfolder into a directory that does not exist yet, click on New directory on the bottom menu bar, create the directory and click on Save.
5. Done! The file/subfolder has been successfully copied to the desired location whereas the original remains at its former place.
8. Deleting files/subfolders:
1. Open the top-level folder that contains the file/subfolder that you want to delete.
2. Click on the triple dot symbol next to the respective file/folder.
3. Click on Delete.
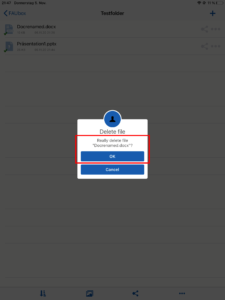
4. Next, you have to confirm your choice by clicking OK in the window that will open up next.
5. Done! The file/folder has been successfully deleted.

